From Concept to Launch: Developing an Android Wallpaper App with Flutter
This blog post gives a complete walkthrough on how to build an Android Wallpaper App with Flutter and publish it in Play Store.
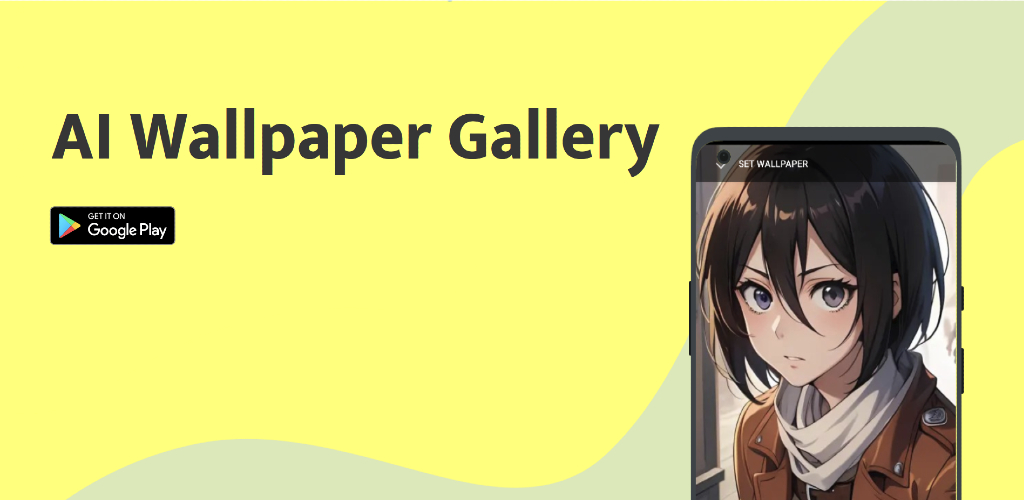 Try it now at Play Store
Back in college, I had opened a Google Play Developer's account. I was motivated to release many Android apps and get few of them to success (more downloads/publicity/etc) but to my surprise, developing Android app is just the first part of the process.The later part of the process involves marketing the app to your social circle/friends/media/news etc to be able to really make it a success. Luckily, one of the apps that I developed with my friends in college did see that success - Naman (but unfortunately Google seemed to have removed it now due to no maintenance).
Anyway 4 years later, going back to my Google Play Console I got a message in my email that they are going to shutdown my developer account due to inactivity.
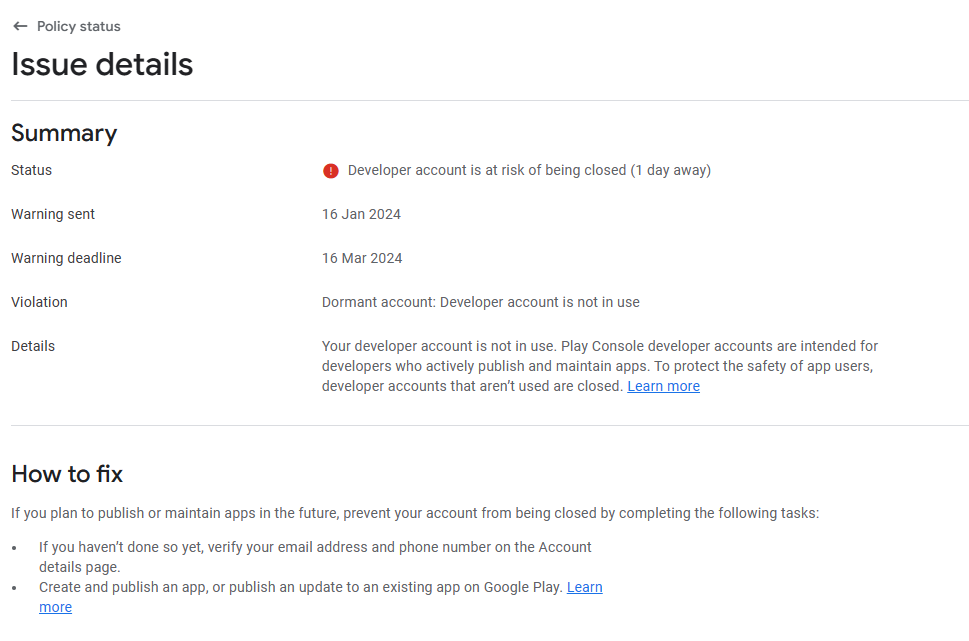
I did not want to lose the account nor the apps that I already published, so I went ahead to develop and publish a new app to meet with their criteria.
The Idea#
I know I wanted to make something small but that can easily be extended by more features. I didn't want to have frequent releases but there should be a factor that will let users to come to the app. Thinking of different ideas from building an image-gen app, voice-assistant app, news app etc.. I ended up with a wallpaper gallery app.
Wallpaper Gallery App#
I wanted the app to be bit engaging and have a way of expanding the given library. So I went ahead with this approach:
- Upload images into hosting service (like postimages, imgbb)
- Create and upload a JSON data file into a remote location that contains links to the thumbnails and original image itself (I created a simple JSON file in the project's Github repository to store this information. This lets me to quickly update my gallery of images in the app without re-deploying or re-publishing).
- App initializes and loads the gallery image data from the remote JSON link.
- Users can set the selected image as their wallpaper.
Setup#
I won't go in details about the dev environment setup, but make sure to have the following things installed:
- Android Studio with SDK + VM [As of this writing this blog, I'm using Android Studio version JellyFish (2023.3.1 Patch 1)]
- Flutter [Flutter version used in this tutorial: Flutter 3.22.2]
- Java [This is helpful when building the app bundles in order to publish in Play Store]
Develop Flutter App#
Project Setup#
Run the following commands to set up a new flutter project.
# Make sure flutter has everything setup
flutter doctor

# Create flutter project
flutter create <project-name>

# Open the project in VSCode (or other favorite editor)
cd <project-name>
code .
You should have some boilerplate code configured. If you are using VS Code, then you can use it's great flutter extension to start the app directly on n Android VM. Even though, we don't really have our Wallpaper app ready we can still go ahead and run the boilerplate code to see if the code is compiling successfully. Once the app launches successfully, you should be able to see a counter app.
Writing your Wallpaper Service#
Adding dependencies#
Update pubspec.yaml with the following dependencies.
# ...

dependencies:
  # ...
  http: ^1.2.1
  cached_network_image: ^3.0.0

# ...
Run flutter pub get to download these dependencies in the project.
Rewriting main.dart#
We will remove the default Counter app in main.dart and create something shown below.
import 'package:flutter/material.dart';
import 'package:my_wallpaper/ui/home.dart';
void main() {
runApp(const MyApp());
}
class MyApp extends StatelessWidget {
const MyApp({super.key});
// This widget is the root of your application.
Widget build(BuildContext context) {
return MaterialApp(
debugShowCheckedModeBanner: false,
title: 'AI Wallpaper Gallery',
theme: ThemeData(
colorScheme: ColorScheme.fromSeed(seedColor: Colors.tealAccent),
useMaterial3: true,
),
home: const HomePage(),
);
}
}Creating Wallpaper Object and Loader#
Now create a folder under your app directory lib/services and create a new dart class-file called lib/services/wallpaper.dart for holding your Wallpaper object.
import 'dart:convert';
import 'package:flutter/material.dart';
import 'package:http/http.dart' as http;
import 'package:cached_network_image/cached_network_image.dart';
// TODO: Update Remote URL for Wallpaper Data with your Link
const String imageWallpeperUrl = "https://raw.githubusercontent.com/rahuldshetty/flutter-wallpaper-app/master/wallpaper_collection/wallpaper_data_v1.json";
class Wallpaper{
final String category;
final String namge;
final String thumbnailUrl;
final String imageUrl;
Wallpaper({required this.category, required this.namge, required this.thumbnailUrl, required this.imageUrl});
factory Wallpaper.fromJson(Map<String, dynamic> json){
return Wallpaper(
category: json['category'],
namge: json['namge'],
thumbnailUrl: json['thumbnailUrl'],
imageUrl: json['imageUrl']);
}
}
class WallpaperService{
static Future<List<Wallpaper>> fetchWallpapers() async {
// Read JSON data from remote location
final response = await http.get(Uri.parse(imageWallpeperUrl));
if (response.statusCode == 200) {
// Load wallpaper data into Object structure
List<dynamic> data = json.decode(response.body);
return data.map((json) => Wallpaper.fromJson(json)).toList();
} else {
throw Exception('Failed to load wallpapers');
}
}
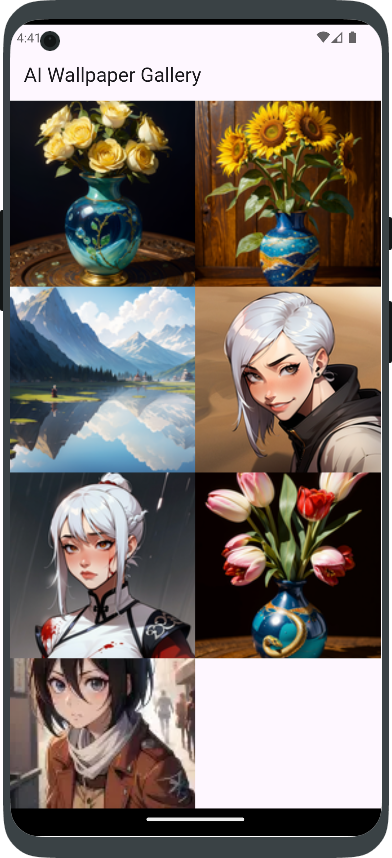
}Implementing Wallpaper Gallery UI#
This will be the home page for our flutter application. We will use a GridView to display the contents of Wallpaper object as they are loaded dynamically during startup.
To do this, let us create a dart component for the UI under the following location lib/ui/home.dart.
import 'package:cached_network_image/cached_network_image.dart';
import 'package:flutter/material.dart';
import 'package:my_wallpaper/services/wallpaper.dart';
import 'package:my_wallpaper/ui/wallpaper_detail.dart';
class HomePage extends StatefulWidget {
const HomePage({super.key});
State<HomePage> createState() => _HomePageState();
}
class _HomePageState extends State<HomePage>{
late Future<List<Wallpaper>> futureWallpaper;
void initState() {
futureWallpaper = WallpaperService.fetchWallpapers();
super.initState();
}
Widget build(BuildContext context) {
return Scaffold(
appBar: AppBar(title: const Text('AI Wallpaper Gallery')),
body: FutureBuilder<List<Wallpaper>>(
future: futureWallpaper,
builder: (context, snapshot){
if(snapshot.connectionState == ConnectionState.waiting){
return const Center(child: CircularProgressIndicator());
} else if (snapshot.hasError){
return const Center(child: Text("Failed to load Wallpaper data"));
} else {
List<Wallpaper>? wallpapers = snapshot.data;
return GridView.builder(
itemCount: wallpapers?.length,
gridDelegate: const SliverGridDelegateWithFixedCrossAxisCount(
crossAxisCount: 2,
childAspectRatio: (1 / .4),
),
itemBuilder: (context, index){
return GestureDetector(
onTap: (){
Navigator.push(
context,
MaterialPageRoute(builder: (context) => WallpaperDetail(wallpapers[index]))
);
},
child: CachedNetworkImage(
imageUrl: wallpapers![index].thumbnailUrl,
placeholder: (context, url) => const Center(child:
SizedBox(
width: 80.0,
height: 80.0,
child: CircularProgressIndicator(),
)
),
errorWidget: (context, url, error) => const Icon(Icons.error),
fit: BoxFit.cover
),
);
}
);
}
},
),
);
}
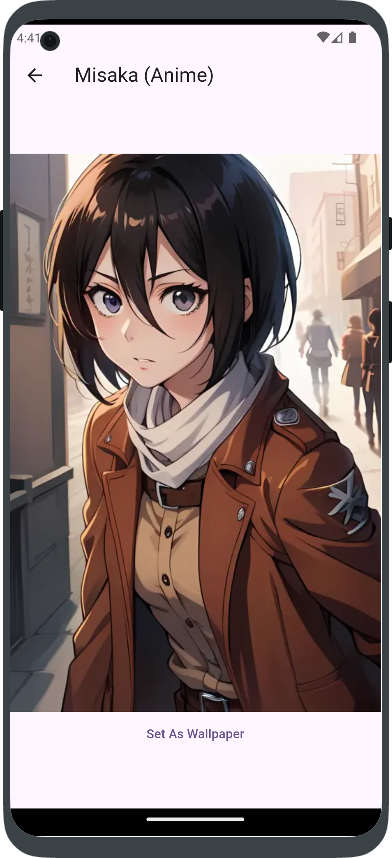
}Opening up Wallpaper in Details Screen#
Now when the user selects any of the image, we want to redirect them to a details screen from where they can set the image as wallpaper.
Let us create another dart file under the ui component lib/ui/wallpaper_detail.dart.
import 'package:cached_network_image/cached_network_image.dart';
import 'package:flutter/material.dart';
import 'package:flutter/services.dart';
import 'package:my_wallpaper/services/wallpaper.dart';
class WallpaperDetail extends StatelessWidget {
final Wallpaper wallpaper;
const WallpaperDetail(this.wallpaper, {super.key});
Widget build(BuildContext context) {
return Scaffold(
resizeToAvoidBottomInset: true,
appBar:
AppBar(title: Text("${wallpaper.namge} (${wallpaper.category})")),
body: SingleChildScrollView (child:Center(
child: Column(
mainAxisAlignment: MainAxisAlignment.center,
crossAxisAlignment: CrossAxisAlignment.center,
children: [
Center(
child: CachedNetworkImage(
imageUrl: wallpaper.imageUrl,
placeholder: (context, url) =>
const CircularProgressIndicator(),
errorWidget: (context, url, error) => const Icon(Icons.error),
fit: BoxFit.cover,
),
),
TextButton(
onPressed: () => {
// TODO: Set Wallpaper functionality
}, child: const Text("Set As Wallpaper"))
],
))));
}Calling native Kotlin to set device wallpaper#
This part was one of the trickest (at least for me as I was out of touch with Mobile App Dev for more than 5 years). I have built the basics, but now its just left is to take the remote image data and set it as wallpaper on the Android device.
My first thought was to see if there are any pre-existing packages/library that does it out-of-the-box in flutter. I hoped onto flutter's pub.dev and looked for wallpaper related package. Most of the libraries that I tried were either outdated or not maintained. I had no choice but to take the difficult route which involved going through the sacred texts (Android Documentation).
I had a breakthrough after a little bit of Googling and OpenAIing/GPTing. The solution involved building the setWallpaper service in native android code (Kotlin/Java) and then have the method called through channels.
In the wallpaper_detail.dart component, add the following changes to call Koltin native code.
// ....
const platform = MethodChannel('com.example.my_wallpaper/setWallpaper');

// Inside "class WallpaperDetail..."
// ...

  Future<void> setAsWallpaper(String imageUrl) async {
    try {
      // download image
      final response = await http.get(Uri.parse(imageUrl));
      if(response.statusCode == 200){
         // Convert response body to Uint8List
        Uint8List bytes = response.bodyBytes;

        await platform.invokeMethod('setWallpaper', bytes);
      } else {
        throw Exception('Downloading image failed!');
      }
    } on PlatformException catch (e) {
      print("Failed to set wallpaper: '${e.message}'");
    }
  }
I won't call myself a Kotlin developer as I have 0 experience before writing this blog post (however I do have some decent idea working with Java for app development), so the code down below may not be the best way to do it. If there are better way to do it, feel free to hit me up in my inbox.
So open the MainActivity.kt* file inside your android/app/main/kotlin/com/example/
package com.example.my_wallpaper
import io.flutter.embedding.android.FlutterActivity
import io.flutter.embedding.engine.FlutterEngine
import io.flutter.plugins.GeneratedPluginRegistrant
import io.flutter.plugin.common.MethodChannel
import android.app.WallpaperManager
import android.graphics.BitmapFactory
import android.content.Context
import android.content.Intent
import android.net.Uri
import android.graphics.Bitmap
import java.io.ByteArrayInputStream
import java.io.ByteArrayOutputStream
import android.provider.MediaStore
class MainActivity : FlutterActivity() {
private val CHANNEL = "com.example.my_wallpaper/setWallpaper"
override fun configureFlutterEngine(flutterEngine: FlutterEngine) {
GeneratedPluginRegistrant.registerWith(flutterEngine)
MethodChannel(flutterEngine.dartExecutor.binaryMessenger, CHANNEL).setMethodCallHandler { call, result ->
if (call.method == "setWallpaper") {
val bytes = call.arguments as ByteArray
setWallpaper(bytes)
result.success(null)
} else {
result.notImplemented()
}
}
}
private fun setWallpaper(bytes: ByteArray) {
val wallpaperManager = WallpaperManager.getInstance(context)
val bitmap = BitmapFactory.decodeStream(ByteArrayInputStream(bytes))
val intent = Intent(wallpaperManager.getCropAndSetWallpaperIntent(getImageUri(context, bitmap)))
startActivity(intent)
finish()
}
private fun getImageUri(context: Context, bitmap: Bitmap): Uri{
val bytes = ByteArrayOutputStream()
bitmap.compress(Bitmap.CompressFormat.JPEG, 100, bytes)
val path = MediaStore.Images.Media.insertImage(context.contentResolver, bitmap, "Title", null)
return Uri.parse(path.toString())
}
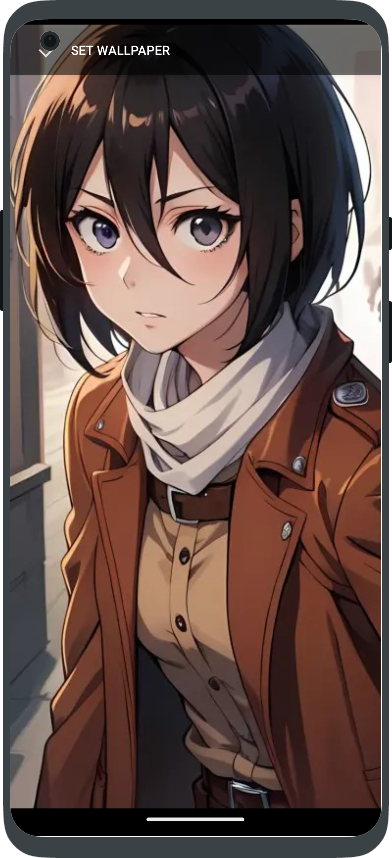
}We use Intent to navigate to the device's wallpaper manager service with getCropAndSetWallpaperIntent. This lets us to crop and set the image as wallpaper. You can improve the logic here to handle error scenarios or other conditions depending on your requirement. I'll leave it up to you to figure that out.
The final hurdle: Setting Android Permissions#
If you tried to run the app before this, then you might be able to get the gallery, go to the details screen but might have trouble setting the image as wallpaper. This is because we are missing the final step of our tutorial i.e, to set the Android permissions.
Find the AndroidManifest.xml and add the following permissions inside the <manifest>...</manifest>.
<uses-permission android:name="android.permission.INTERNET" />
<uses-permission android:name="android.permission.SET_WALLPAPER"/>
Now you should be able to compile, build and test the app on the Android VM or a phone device.
Publishing App to Play Store#
I personally followed these two medium articles - link 1 and link 2 that had a good walkthrough on how to update contents and publish your android app into Play Store.
Update App Name#
If you want to change the app name then you can update it in AndroidManifest.xml.
    <application
        android:label="My App Name"
        android:name="${applicationName}"
        android:icon="@mipmap/ic_launcher"
        android:enableOnBackInvokedCallback="true"
Generating Key Store#
Create android/key.properties with the following properties and your secret values.
storePassword=<Something Secret>
keyPassword=<Something Secret>
keyAlias=my-key-alias
storeFile=my-key.jks
Now create a keystore with your secrets.
keytool -genkey -v -keystore C:\Users\USER_NAME\my-key.jks -storetype JKS -keyalg RSA -keysize 2048 -validity 10000 -alias my-key-alias
This will create a file called my-key.jks in user directory. Now copy this file inside your app directory under the location android/app/my-key-jks.
Now update andorid/app/build.gradle with the following configuration for the signing keys:
// ...
def keystoreProperties = new Properties()
def keystorePropertiesFile = rootProject.file('key.properties')
if (keystorePropertiesFile.exists()) {
       keystoreProperties.load(new FileInputStream(keystorePropertiesFile))
}

// Inside andorid namespace
android {
  // ...

  signingConfigs {
    release {
          keyAlias keystoreProperties['keyAlias']
          keyPassword keystoreProperties['keyPassword']
          storeFile keystoreProperties['storeFile'] ? file(keystoreProperties['storeFile']) : null
          storePassword keystoreProperties['storePassword']
      }
    }

  buildTypes {
      release {
          // TODO: Add your own signing config for the release build.
          // Signing with the debug keys for now, so `flutter run --release` works.
          signingConfig = signingConfigs.release
      }
  }

  // ...
Play Store Release#
You can follow the steps mentioned in the above guides on releasing app t0 Play Stores.
But here are couple of things that you can make use of to make your app more appealing to audience.
Custom App Icon#
icon.kitchen is a great place to get your custom icon for android app. It lets you generate manifests of resources for different screen resolution that you can directly import into your project.
Phone Mockups#
MockUp Phone is another free tool that lets you generate pictures of your android app on a phone mockups.
Build the Bundle#
Now we can build the app as a bundle, so it can be deployed to the store.
flutter build appbundleConclusion#
You can directly install the android app on your phone through: Play Store
You can find the complete code for this tutorial at Github
Feel free to clone the repo and build upon this app.